


Trends
How to Turn Product Photos Into AI Video Ads That Are Ready to Run
Learn how to turn product photos into AI video ads using a practical workflow for storyboarding, generation, editing, quality control, and delivery.
Published:

Read Time:

4 min

Written by:
Fawwaz
Trend Research and Copywriter
KEEP THE PRODUCT ACCURATE WHILE THE SCENE MOVES.
Brands can create video ads with AI using existing product photos to develop scenes, motion, and creative variations. The useful starting point is a concept that can be communicated through those assets, such as a product reveal, familiar setting, or verified feature.
KEEP THE PRODUCT ACCURATE WHILE THE SCENE MOVES.
Brands can create video ads with AI using existing product photos to develop scenes, motion, and creative variations. The useful starting point is a concept that can be communicated through those assets, such as a product reveal, familiar setting, or verified feature.
KEEP THE PRODUCT ACCURATE WHILE THE SCENE MOVES.
Brands can create video ads with AI using existing product photos to develop scenes, motion, and creative variations. The useful starting point is a concept that can be communicated through those assets, such as a product reveal, familiar setting, or verified feature.
Overview
Existing product photos can support reveals, context scenes, and verified feature highlights.
Reference-guided generation does not guarantee accurate packaging throughout a clip.
Plan each scene before generation and composite approved product assets where needed.
Add controlled copy and cleared audio, then review product accuracy and placement requirements.
Deliver final exports with source records, version IDs, and a clear testing hypothesis.
The WD-40 case illustrates AI-assisted production within a broader campaign, rather than proof of AI’s independent performance advantage.
The challenge is keeping the product accurate throughout the finished ad. A practical workflow separates generation from product compositing, copy approval, quality review, and delivery for the intended placement.
Three Product Ad Concepts to Start With
Start with concepts that can be communicated without inventing product behavior or revealing unphotographed surfaces.

Concept | Example | Production Boundary |
Product reveal | A bottle introduced through a slow push-in or background transition | Keep the photographed angle; avoid a full rotation without suitable source assets |
Context scene | Coffee on a kitchen counter or moisturizer beside a mirror | Match product scale, perspective, and lighting to the setting |
Feature highlight | A close-up of packaging texture or a verified ingredient callout | Use approved photography and add readable text during editing |
How to Create Product Video Ads With AI
Step 1: Prepare the Product Inputs
Good AI product advertising begins before the generation tool opens. Build a clean reference pack first.
Approved Packshots
High-quality product photography is essential for AI video generation. Runway's image-to-video guidance explains that the source image determines composition, subject matter, lighting, and style, while existing visual imperfections may become more noticeable when motion is added.
Brands should prioritize high-resolution images, sharp labels, clean product edges, accurate colors, minimal compression, and multiple product angles when available. Avoid using images with distorted text, poor retouching, or other visible flaws, as these can affect the quality and accuracy of the generated video.
Packaging References
Collect front, back, side, cap, and label references for production and review. Confirm which reference inputs the selected model supports. Having multiple photos in the project folder does not mean an image-to-video model uses all of them in one generation.
Product Description
Record a factual description of the product’s shape, materials, color, packaging, and capacity. Use it to guide scene planning and check outputs. It does not replace visual verification against the photographs.
Brand Colors
Keep approved color values available for backgrounds, graphics, captions, and end cards. Apply exact brand colors during editing rather than expecting generation to reproduce them precisely.
Product Dimensions
Record dimensions so editors can judge scale against surrounding objects. Measurements in a prompt can guide generation, but the final scene still needs a visual scale check.
Approved Claims
Create a claim sheet using product information and wording already approved by the brand. The following examples are hypothetical; their status depends on the actual product and supporting evidence.
Claim | Treatment |
“Contains niacinamide” | Use only if confirmed for this formula |
“500 ml bottle” | Match the advertised variant |
“Designed for sensitive skin” | Use only if approved and supported |
“Repairs skin overnight” | Exclude unless the claim is supported and approved |
The generation workflow should never become the source of product claims, but visualize claims that the brand has already approved.
Step 2: Build the Storyboard Before Generating Anything
Consider a hypothetical 15-second moisturizer ad. Assume the ingredient claim has been verified. Each scene has one job, with product photography kept separate from generated background footage.
Timing | Scene Job | Product and Motion Treatment | On-Screen Copy |
0–4 sec | Introduce the context | Approved bottle cutout over a bathroom background; slow push-in added during editing | “Your morning moisturizer” |
4–11 sec | Show one feature | Approved product close-up with an edited ingredient callout | “With niacinamide” |
11–15 sec | Present the next action | Approved packshot, brand background, and minimal animation | “Shop the moisturizer” |
Step 3: Generate Motion, Not a New Product
For image-to-video generation, the source image establishes the visual starting point, while the prompt describes motion. Runway recommends beginning with a simple prompt focused on the most important movement, then refining it.
For example: “A slow camera push-in toward the stationary bottle. Soft background light shifts gently.”
This guides the shot; it does not lock the packaging. Inspect the result for changes before using it in the edit.
Start With Controlled Motion
Begin with a static shot, restrained camera movement, or simple environmental motion. Add complexity only when the resulting product representation remains acceptable.
Firefly supports first and last frame inputs. In its documented image-to-video workflow, camera Motion controls are available with a first frame only and are disabled when an end frame is added. Choose the setup that fits the shot rather than assuming all controls can be combined.
Reject Distorted Product Generations
Reject a clip when product distortion cannot be corrected convincingly. Record the failure before regenerating, simplifying the shot, or switching to a composited product asset. Use the final QA checklist in Step 5 to judge acceptability.
Step 4: Use Real Product Assets During Editing
To preserve packaging details, keep approved product photography on a separate layer and composite it over generated footage. A 2D cutout is most practical when its angle remains compatible with the scene. Shots with rotation, occlusion, or handling may require tracking, masks, additional photography, or a 3D asset.
Use Accurate Product Cutouts
Match scale, perspective, lighting, contact shadows, and any objects passing in front of the product. If the cutout cannot fit the scene convincingly, change the shot rather than forcing the composite.
Add Captions During the Edit
Add final advertising copy during the editing stage rather than relying on AI generation. This gives brands greater control over spelling, typography, product claims, readability, timing, and text placement. Captions should remain clear on mobile screens, with important information positioned away from areas covered by platform interface elements.
Use Cleared Audio
AI-generated visuals still require properly licensed audio. Brands should ensure that soundtracks are cleared for their intended advertising placements, since music rights for organic social content do not automatically cover paid ads. Always verify licensing terms and platform requirements before delivering the final video.
Export by Placement
Choose the target placements before storyboarding so the composition leaves room for interface elements and copy. Export only the required versions, then check aspect ratio, resolution, duration, file settings, audio, and safe areas against the current placement requirements.
Step 5: Run a Product Accuracy Review
Review the assembled ad against the approved product references and claim sheet. Inspect motion-sensitive sections frame by frame, then watch the final placement export on a phone.
Review Area | What to Verify |
Product identity | Correct variant, logo, label, typography, shape, cap, and colors |
Scale and perspective | Believable size and placement relative to surrounding objects |
Continuity | No drifting labels, changing shapes, unstable reflections, or inconsistent shadows |
Product behavior | Demonstrations and implied outcomes match supported product capabilities |
Copy and claims | Correct names, quantities, prices, offers, captions, voiceover, and visual claims |
Placement readiness | Readable text, suitable timing, safe areas, and correct export settings |
“Ready to run” means the asset has passed the team’s creative and technical checks for its intended placement. Platform approval still depends on the applicable advertising requirements.
Step 6: Prepare the Campaign Handoff
A finished MP4 file is only part of the delivery. The media or growth team needs enough information to understand what the creative is testing.
Handoff
Use consistent filenames, for example:
MOISTURIZER_HOOK01_FEATURE01_9x16_V1.mp4
MOISTURIZER_HOOK02_FEATURE01_9x16_V1.mp4
Avoid filenames such as:
finalfinal2NEW.mp4
Version discipline becomes more important once the team starts testing several concepts.
Include the Rights Records
Document:
Source photography ownership
Generated asset terms
Stock or licensed footage
Music rights
Fonts
Third-party graphics
The campaign team should know where every major asset came from.
Include the Creative Hypothesis
Record the question each version is designed to test, such as whether a routine setting attracts more initial attention than a packshot opening. Include the variant ID and intended metric so reporting can connect results to the correct asset.
Separate Variables Where Possible
For a controlled comparison, vary the chosen element while keeping the offer, message, and distribution conditions as comparable as possible. Broader concept tests may change several elements, but they provide less certainty about which change explains the result.
What the WD-40 Case Shows
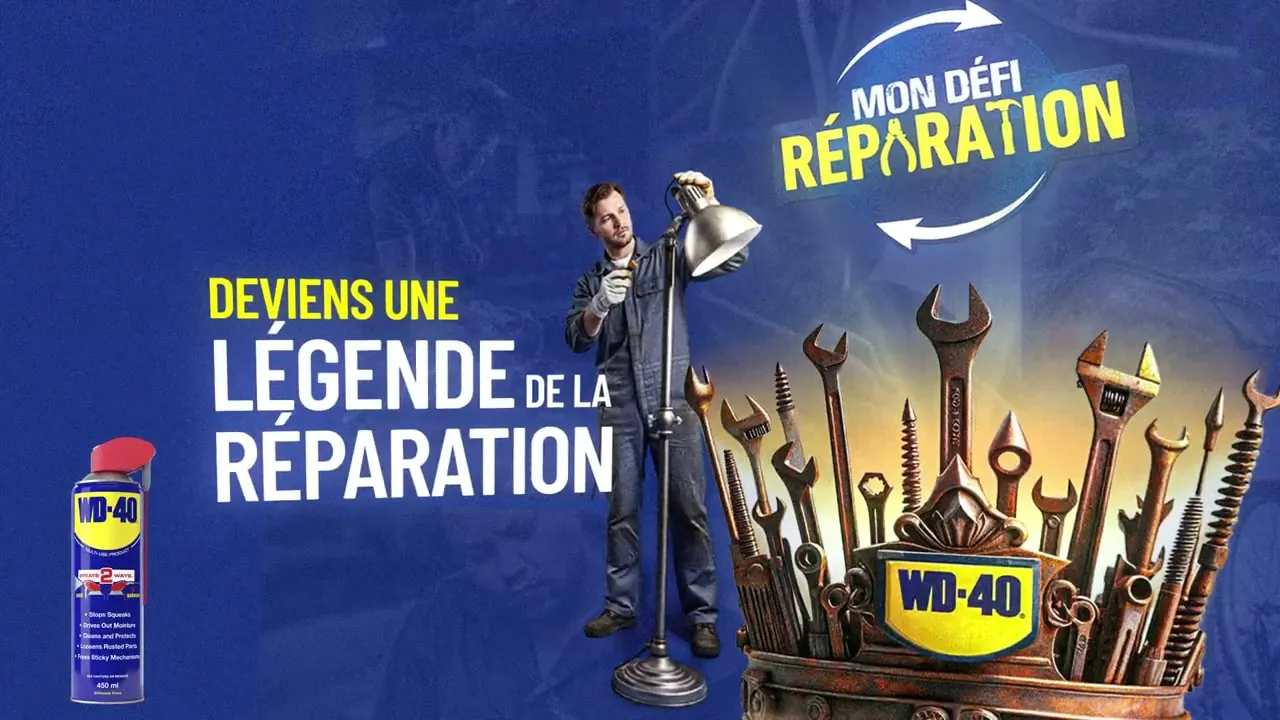
Amazon Ads reports that WD-40 Company and Bizon used existing product visuals and lifestyle images to generate video for the 2026 French launch of WD-40 Specialist Professional Degreaser. The campaign combined Sponsored Brands video, Amazon DSP Online Video, and display and search activity.
Amazon reported more than 50% growth in average daily sales after video activation, 88% new-to-brand purchases, and CTR 45% above category benchmarks. Sales and acquisition figures describe campaign outcomes, while CTR describes creative performance against a benchmark.
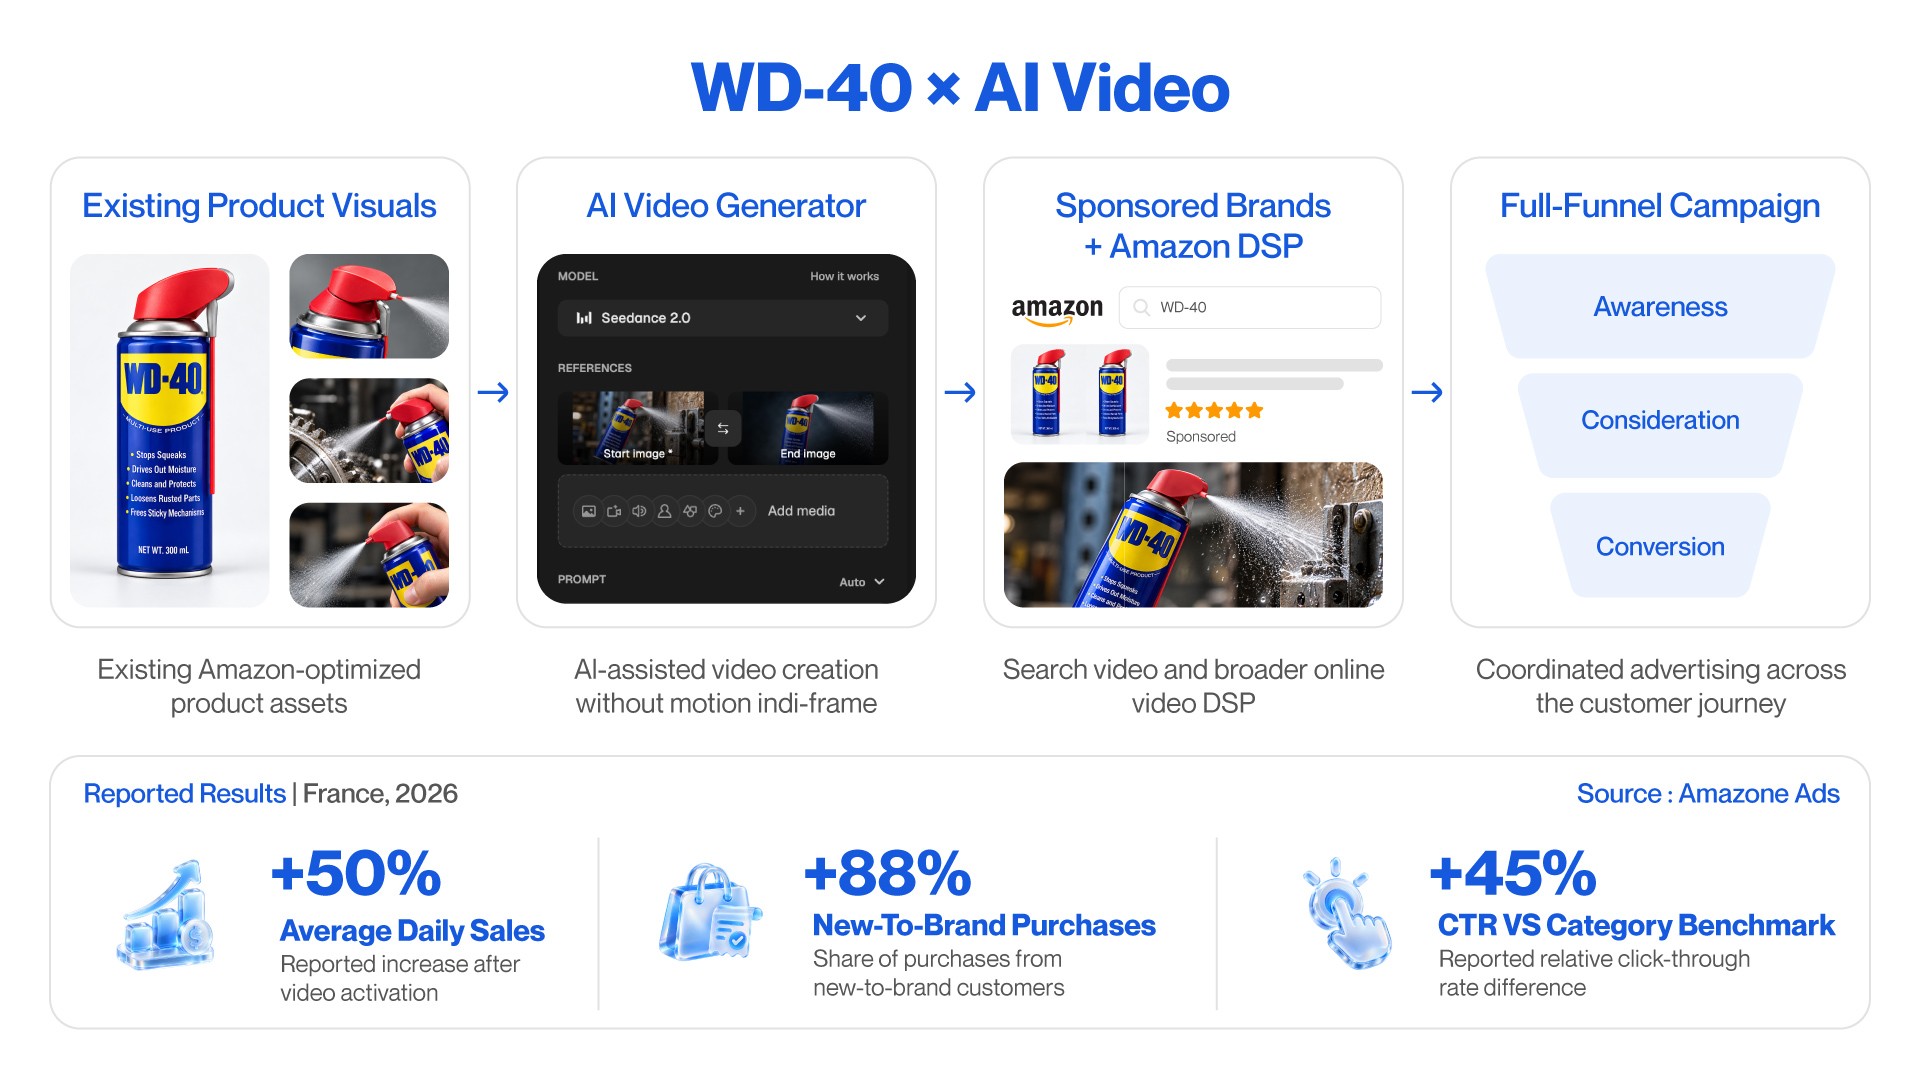
The case supports using existing photography as an input to video production. It does not compare AI-generated creative with equivalent traditionally produced creative, so it does not establish that AI generation itself caused the reported gains.
From Generated Clip to Campaign Asset
A usable AI product video needs a defined concept, an accurate product representation, approved copy, and a checked placement export. Choose the simplest production method that achieves the intended scene convincingly.

Masterhooks describes an AI Ads workflow covering concept development, art direction, generation, editing, and delivery. Its service page also emphasizes approved product visuals and frame-level review.
Want to identify which product photos and concepts could support your brand’s next AI video campaign?
Want to identify which product photos and concepts could support your brand’s next AI video campaign?
The challenge is keeping the product accurate throughout the finished ad. A practical workflow separates generation from product compositing, copy approval, quality review, and delivery for the intended placement.
Three Product Ad Concepts to Start With
Start with concepts that can be communicated without inventing product behavior or revealing unphotographed surfaces.
Concept | Example | Production Boundary |
Product reveal | A bottle introduced through a slow push-in or background transition | Keep the photographed angle; avoid a full rotation without suitable source assets |
Context scene | Coffee on a kitchen counter or moisturizer beside a mirror | Match product scale, perspective, and lighting to the setting |
Feature highlight | A close-up of packaging texture or a verified ingredient callout | Use approved photography and add readable text during editing |
How to Create Product Video Ads With AI
Step 1: Prepare the Product Inputs
Good AI product advertising begins before the generation tool opens. Build a clean reference pack first.
Approved Packshots
High-quality product photography is essential for AI video generation. Runway's image-to-video guidance explains that the source image determines composition, subject matter, lighting, and style, while existing visual imperfections may become more noticeable when motion is added.
Brands should prioritize high-resolution images, sharp labels, clean product edges, accurate colors, minimal compression, and multiple product angles when available. Avoid using images with distorted text, poor retouching, or other visible flaws, as these can affect the quality and accuracy of the generated video.
Packaging References
Collect front, back, side, cap, and label references for production and review. Confirm which reference inputs the selected model supports. Having multiple photos in the project folder does not mean an image-to-video model uses all of them in one generation.
Product Description
Record a factual description of the product’s shape, materials, color, packaging, and capacity. Use it to guide scene planning and check outputs. It does not replace visual verification against the photographs.
Brand Colors
Keep approved color values available for backgrounds, graphics, captions, and end cards. Apply exact brand colors during editing rather than expecting generation to reproduce them precisely.
Product Dimensions
Record dimensions so editors can judge scale against surrounding objects. Measurements in a prompt can guide generation, but the final scene still needs a visual scale check.
Approved Claims
Create a claim sheet using product information and wording already approved by the brand. The following examples are hypothetical; their status depends on the actual product and supporting evidence.
Claim | Treatment |
“Contains niacinamide” | Use only if confirmed for this formula |
“500 ml bottle” | Match the advertised variant |
“Designed for sensitive skin” | Use only if approved and supported |
“Repairs skin overnight” | Exclude unless the claim is supported and approved |
The generation workflow should never become the source of product claims, but visualize claims that the brand has already approved.
Step 2: Build the Storyboard Before Generating Anything
Consider a hypothetical 15-second moisturizer ad. Assume the ingredient claim has been verified. Each scene has one job, with product photography kept separate from generated background footage.
Timing | Scene Job | Product and Motion Treatment | On-Screen Copy |
0–4 sec | Introduce the context | Approved bottle cutout over a bathroom background; slow push-in added during editing | “Your morning moisturizer” |
4–11 sec | Show one feature | Approved product close-up with an edited ingredient callout | “With niacinamide” |
11–15 sec | Present the next action | Approved packshot, brand background, and minimal animation | “Shop the moisturizer” |
Step 3: Generate Motion, Not a New Product
For image-to-video generation, the source image establishes the visual starting point, while the prompt describes motion. Runway recommends beginning with a simple prompt focused on the most important movement, then refining it.
For example: “A slow camera push-in toward the stationary bottle. Soft background light shifts gently.”
This guides the shot; it does not lock the packaging. Inspect the result for changes before using it in the edit.
Start With Controlled Motion
Begin with a static shot, restrained camera movement, or simple environmental motion. Add complexity only when the resulting product representation remains acceptable.
Firefly supports first and last frame inputs. In its documented image-to-video workflow, camera Motion controls are available with a first frame only and are disabled when an end frame is added. Choose the setup that fits the shot rather than assuming all controls can be combined.
Reject Distorted Product Generations
Reject a clip when product distortion cannot be corrected convincingly. Record the failure before regenerating, simplifying the shot, or switching to a composited product asset. Use the final QA checklist in Step 5 to judge acceptability.
Step 4: Use Real Product Assets During Editing
To preserve packaging details, keep approved product photography on a separate layer and composite it over generated footage. A 2D cutout is most practical when its angle remains compatible with the scene. Shots with rotation, occlusion, or handling may require tracking, masks, additional photography, or a 3D asset.
Use Accurate Product Cutouts
Match scale, perspective, lighting, contact shadows, and any objects passing in front of the product. If the cutout cannot fit the scene convincingly, change the shot rather than forcing the composite.
Add Captions During the Edit
Add final advertising copy during the editing stage rather than relying on AI generation. This gives brands greater control over spelling, typography, product claims, readability, timing, and text placement. Captions should remain clear on mobile screens, with important information positioned away from areas covered by platform interface elements.
Use Cleared Audio
AI-generated visuals still require properly licensed audio. Brands should ensure that soundtracks are cleared for their intended advertising placements, since music rights for organic social content do not automatically cover paid ads. Always verify licensing terms and platform requirements before delivering the final video.
Export by Placement
Choose the target placements before storyboarding so the composition leaves room for interface elements and copy. Export only the required versions, then check aspect ratio, resolution, duration, file settings, audio, and safe areas against the current placement requirements.
Step 5: Run a Product Accuracy Review
Review the assembled ad against the approved product references and claim sheet. Inspect motion-sensitive sections frame by frame, then watch the final placement export on a phone.
Review Area | What to Verify |
Product identity | Correct variant, logo, label, typography, shape, cap, and colors |
Scale and perspective | Believable size and placement relative to surrounding objects |
Continuity | No drifting labels, changing shapes, unstable reflections, or inconsistent shadows |
Product behavior | Demonstrations and implied outcomes match supported product capabilities |
Copy and claims | Correct names, quantities, prices, offers, captions, voiceover, and visual claims |
Placement readiness | Readable text, suitable timing, safe areas, and correct export settings |
“Ready to run” means the asset has passed the team’s creative and technical checks for its intended placement. Platform approval still depends on the applicable advertising requirements.
Step 6: Prepare the Campaign Handoff
A finished MP4 file is only part of the delivery. The media or growth team needs enough information to understand what the creative is testing.
Handoff
Use consistent filenames, for example:
MOISTURIZER_HOOK01_FEATURE01_9x16_V1.mp4
MOISTURIZER_HOOK02_FEATURE01_9x16_V1.mp4
Avoid filenames such as:
finalfinal2NEW.mp4
Version discipline becomes more important once the team starts testing several concepts.
Include the Rights Records
Document:
Source photography ownership
Generated asset terms
Stock or licensed footage
Music rights
Fonts
Third-party graphics
The campaign team should know where every major asset came from.
Include the Creative Hypothesis
Record the question each version is designed to test, such as whether a routine setting attracts more initial attention than a packshot opening. Include the variant ID and intended metric so reporting can connect results to the correct asset.
Separate Variables Where Possible
For a controlled comparison, vary the chosen element while keeping the offer, message, and distribution conditions as comparable as possible. Broader concept tests may change several elements, but they provide less certainty about which change explains the result.
What the WD-40 Case Shows
Amazon Ads reports that WD-40 Company and Bizon used existing product visuals and lifestyle images to generate video for the 2026 French launch of WD-40 Specialist Professional Degreaser. The campaign combined Sponsored Brands video, Amazon DSP Online Video, and display and search activity.
Amazon reported more than 50% growth in average daily sales after video activation, 88% new-to-brand purchases, and CTR 45% above category benchmarks. Sales and acquisition figures describe campaign outcomes, while CTR describes creative performance against a benchmark.
The case supports using existing photography as an input to video production. It does not compare AI-generated creative with equivalent traditionally produced creative, so it does not establish that AI generation itself caused the reported gains.
From Generated Clip to Campaign Asset
A usable AI product video needs a defined concept, an accurate product representation, approved copy, and a checked placement export. Choose the simplest production method that achieves the intended scene convincingly.
Masterhooks describes an AI Ads workflow covering concept development, art direction, generation, editing, and delivery. Its service page also emphasizes approved product visuals and frame-level review.
Want to identify which product photos and concepts could support your brand’s next AI video campaign?
Related Reading
Related Reading

What Fourth Wing Reveals About BookTok and Community Marketing
4 min
|
Trends
What Fourth Wing Reveals About BookTok and Community Marketing
See how Fourth Wing fans turn one book into reactions, theories, recommendations, and rituals, and what brands can learn from community-led marketing.
4 min
|
Trends
Why Pretty Little Liars and The Love Hypothesis Are Going Viral in the Same Week
5 min
|
Trends
Why Pretty Little Liars and The Love Hypothesis Are Going Viral in the Same Week
Learn how Pretty Little Liars and The Love Hypothesis turn fans into engines for fan-generated content, and what brands can learn about community-led growth.
5 min
|
Trends

What Is a Content Pillar? (And How to Build One That Actually Works for UGC)
4 min
|
Trends
What Is a Content Pillar? (And How to Build One That Actually Works for UGC)
Learn what a content pillar is, why it matters for UGC, and how to build a practical content pillar strategy with creator briefs and real examples.
4 min
|
Trends


Need help scaling?
Book a strategy call with our expert team to audit your current UGC setup.